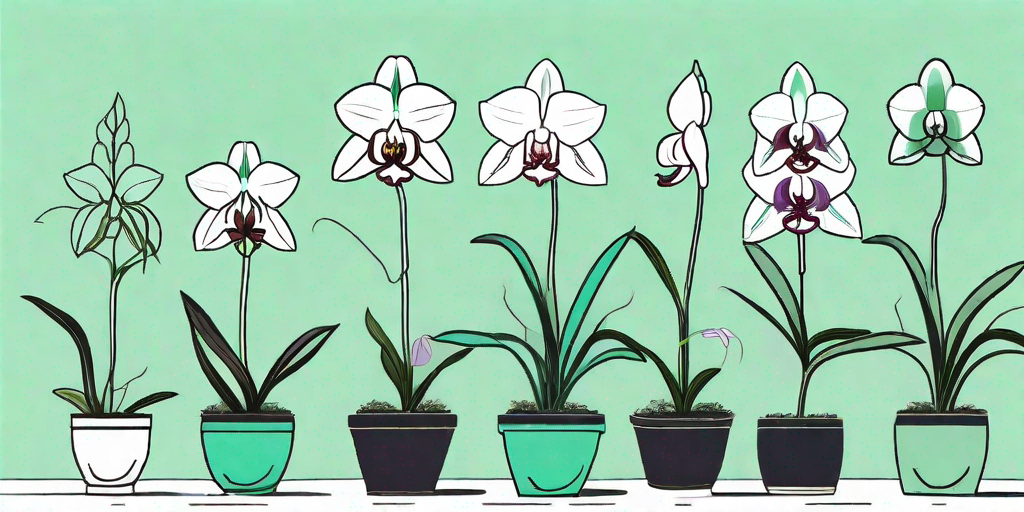

Orchids, those glamorous divas of the plant world, are known for their captivating flowers and elegant foliage. But did you know that their air roots also play a crucial role in their overall health and well-being? Yes, even these seemingly unruly tendrils have their own set of needs! In this article, we will delve into the importance of trimming air roots in orchids and how it can contribute to their optimal growth. So put on your gardening gloves and let's dive in!
Maintaining Healthy Air Roots in Orchids
Before we get into the nitty-gritty of trimming air roots, let's first understand why they are so important for our orchid friends. Air roots, also known as aerial roots, are the orchid's very own respiratory system. Just like we humans and our penchant for oxygen, orchids need fresh air too.
Now, imagine having clogged nostrils all the time and struggling to breathe. Definitely not a pleasant thought, right? Well, that's pretty much how an orchid feels when its air roots are congested. These roots absorb the much-needed oxygen and help the plant respire efficiently.
The Importance of Trimming Air Roots in Orchids
While air roots are essential for an orchid's respiration, they can sometimes grow out of control, resembling Medusa's unruly locks. When left unattended, these wild tendrils can harm the plant more than help it. That's where the practice of trimming air roots comes into play.
Trimming air roots not only helps maintain the overall aesthetics of your orchid, but it also promotes healthier growth. By removing excess or damaged roots, you are allowing the plant to redirect its energy towards developing stronger roots that are better equipped to absorb nutrients and water.
Think of it as getting a haircut – it's a refreshing change that stimulates new growth and makes you feel like a million bucks. The same principle applies to our orchid buddies.
Step-by-Step Guide to Trimming Air Roots on Orchids
Now, let's get down to the nuts and bolts of this whole air root trimming business. Grab your pruning shears, and let's get started!
- Step 1: Assess the Situation
- Step 2: Sanitize Your Tools
- Step 3: Snip, Snip, Snip
- Step 4: Observe and Appreciate
Before taking any action, take a close look at your orchid's air roots. Identify any dead, damaged, or excessively long roots that need a trim.
Remember that orchids, like any other living being, can fall prey to infections. Make sure to disinfect your pruning shears before use to prevent the spread of any potential diseases.
Gently hold the base of the air root you wish to trim and carefully snip it just above any damaged or dead areas. Be sure not to cut too close to the main stem to avoid causing unnecessary harm.
Take a step back and admire your handiwork. Marvel at how your orchid now looks sleeker and more refined with its newly trimmed air roots.
Voilà! You've mastered the art of trimming air roots on orchids! Just remember that moderation is key; don't go overboard and start transforming your orchid into a bonsai-inspired masterpiece.
Caring for Philodendron: Trimming Air Roots
Ah, the philodendron – a hardy and beloved houseplant that can easily turn any gloomy corner into a lush oasis. But what about those adorable little aerial roots that peek out from the pot? Let's uncover the secrets of trimming air roots on philodendron plants!
How to Properly Trim Air Roots on Philodendron Plants
Trimming air roots on philodendrons follows a similar concept to orchids, but with a few tweaks to suit their specific needs. Here's how you can keep your philodendron's air roots in check:
- Step 1: Assess the Situation (Again)
- Step 2: Sanitize Your Tools (Again)
- Step 3: Snip, Snip, Snip (Slightly Differently)
- Step 4: Observe and Appreciate (with a Philodendron Twist)
Just like before, examine your philodendron's air roots and identify any that need a little sprucing up.
Remember what they say – clean tools, happy plants! Give your pruning shears another round of sanitization before getting into action.
Hold the base of the air root and snip it just above any damaged or excessively long sections. However, for philodendrons, it's advisable to leave a small portion intact, as they can often grow into supplementary roots.
Stand back and admire your newly trimmed philodendron, complete with its trimmed and potentially budding air roots.
There you have it – a dashing philodendron with a touch of finesse, thanks to some well-placed scissor snips!
Pruning Air Roots on Dwarf Schlefflera: A Complete Guide
Ah, the dwarf schefflera – an adorable miniature version of its larger, leafy relative. Pruning air roots on these lovable plants may be a bit different, but fear not, we have put together a complete guide just for you!
Tips for Pruning Air Roots on Dwarf Schlefflera Plants
Dwarf schleffleras, with their compact stature, require special attention when it comes to air root pruning. Follow these tips to ensure your little green friend thrives:
- Tip 1: Be Meticulous
- Tip 2: Keep It Clean
- Tip 3: Snip, Snip, Snip (with a Little Extra Care)
- Tip 4: Observe and Appreciate (with a Smile)
Inspect your dwarf schlefflera's air roots with hawk-like precision. Identify any unwanted or damaged roots that require pruning.
Sanitize your pruning shears yet again. Cleanliness may not always be next to godliness, but in the plant world, it's pretty close.
This time, trim the air roots, focusing on removing any weak or decaying sections. Be mindful not to disturb the delicate root system too much.
Step back and bask in the sight of your perfectly pruned dwarf schlefflera, ready to win hearts with its dapper demeanor.
A well-groomed dwarf schlefflera is a joy to behold. With a little bit of pruning finesse, you'll have your mini marvel flourishing in no time!
Common Mistakes to Avoid When Trimming Air Roots on Dwarf Schlefflera
While we're on the topic of pruning, it's important to be aware of a few common mistakes that can sabotage your dwarf schlefflera's air root trimming success:
- Mistake 1: Overzealous Snipping
- Mistake 2: Cutting Too Close
- Mistake 3: Ignoring Root Health
In your excitement to get rid of those pesky air roots, it's easy to go scissor-crazy. Avoid excessive pruning, as it can hinder the plant's ability to absorb essential nutrients.
Remember, when trimming air roots, leave a small section intact to allow potential supplementary roots to develop.
Don't get too carried away with removing air roots and overlook the overall health of the root system. Keep a watchful eye for signs of rot or disease.
By steering clear of these common blunders, you'll lead your own personal dwarf schlefflera success story!
FAQs
Q: Can I trim air roots on all types of orchids?
A: While trimming air roots is generally beneficial for most orchids, it's always best to research the specific needs of your orchid variety. Some orchids, like epiphytes, rely heavily on their air roots for support and nutrient absorption, so exercise caution when pruning.
Q: How often should I trim air roots on my orchid?
A: It's recommended to periodically assess your orchid's air roots and trim as necessary. However, avoid excessive trimming, as this can stress out the plant. A good rule of thumb is to trim when roots become excessively long, damaged, or hinder the orchid's overall stability.
Q: Do air roots serve any purpose other than respiration?
A: Absolutely! Besides helping with respiration, air roots can also act as anchors for epiphytic orchids. They can attach themselves to trees, rocks, or other surfaces, allowing the orchid to absorb nutrients, water, and even sunlight. Think of air roots as nature's very own multitasking superstars!
Q: Can I propagate orchids using trimmed air roots?
A: While it's uncommon to propagate orchids solely using air roots, you can use the trimmed roots as part of a larger propagation process. Utilize the trimmed portions alongside healthy sections of the plant or follow specific propagation techniques recommended for your orchid variety.
And there you have it, dear plant enthusiasts – a comprehensive guide on the importance of trimming air roots in orchids, philodendrons, and dwarf schleffleras. Remember, by giving those unruly tendrils a little bit of love and attention, you're setting your plants up for optimal growth and, of course, keeping your green thumb reputation intact. Happy trimming!